Features
The ESP32-S3 is one of the best microcontrollers of Espressif that incorporates a double core XTensa LX7, capable of running up to 240MHz. In addition, it integrates 2.4GHz connectivity with support for WiFi and Bluetooth LE. In the following image you can see the functional diagram of the ESP32-S3 with all the peripherals it incorporates: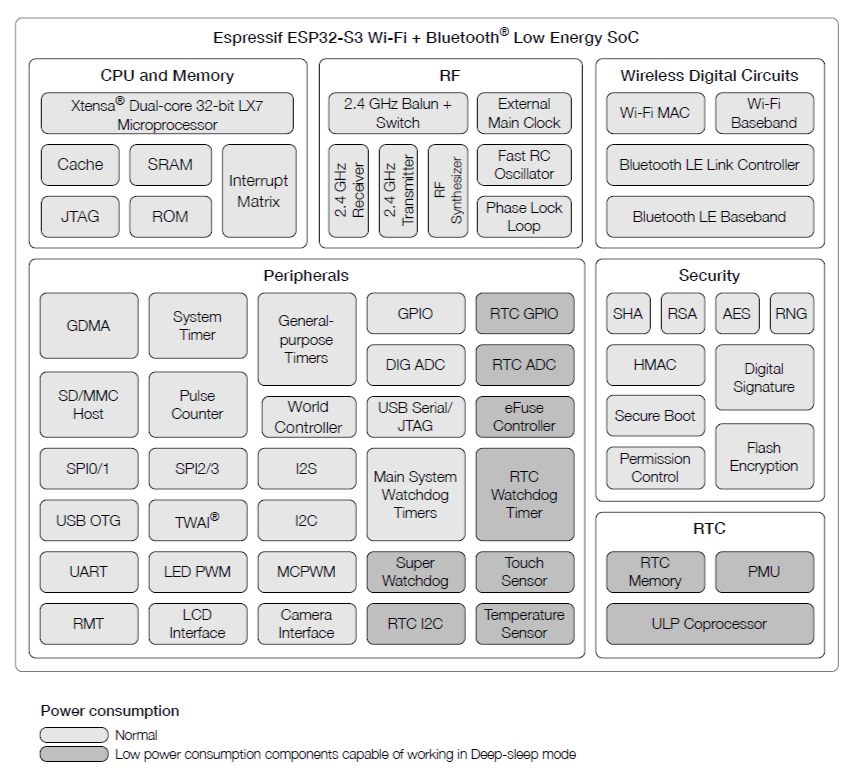
Functional diagram of the ESP32-S3
Antenna
Inside the Kode Dot we have integrated a 2.4GHz antenna in the PCB. With this antenna you will be able to use the WiFi and Bluetooth LE of the ESP32-S3, as well as ESP-NOW and other communication protocols that work in this frequency band.Programming
Programming the Kode Dot is done like any other ESP32-S3-based board. Connect it directly to your computer using the USB-C cable and start uploading your code.In the Applications section it is explained in detail how to upload code and create applications.
State control
The control of the BOOT and RESET states of the ESP32-S3 is performed using simple combinations with the buttons of the Kode Dot.RESET
To reset the Kode Dot, you must press the left button of the pad at the same time as you press the bottom button. This is useful in these cases:- When a program has been flashed and the Kode Dot is locked.
- To exit an application and return to the main menu.
BOOT
To enter the Kode Dot in BOOT mode, while holding the top button, the Kode Dot must be reset following the RESET combination.It is likely that you will not have to use this process since if the code you upload to the Kode Dot blocks or makes the ESP32-S3 restart, the Kode Dot will return to the main menu automatically.
Example code
With this code you can get the MAC address of the different interfaces of the ESP32-S3.esp32s3_info.ino