> ## Documentation Index
> Fetch the complete documentation index at: https://docs.kode.diy/llms.txt
> Use this file to discover all available pages before exploring further.
# Quickstart
> Quick guide to understand the Kode Dot and start with the applications.
# What is the Kode Dot
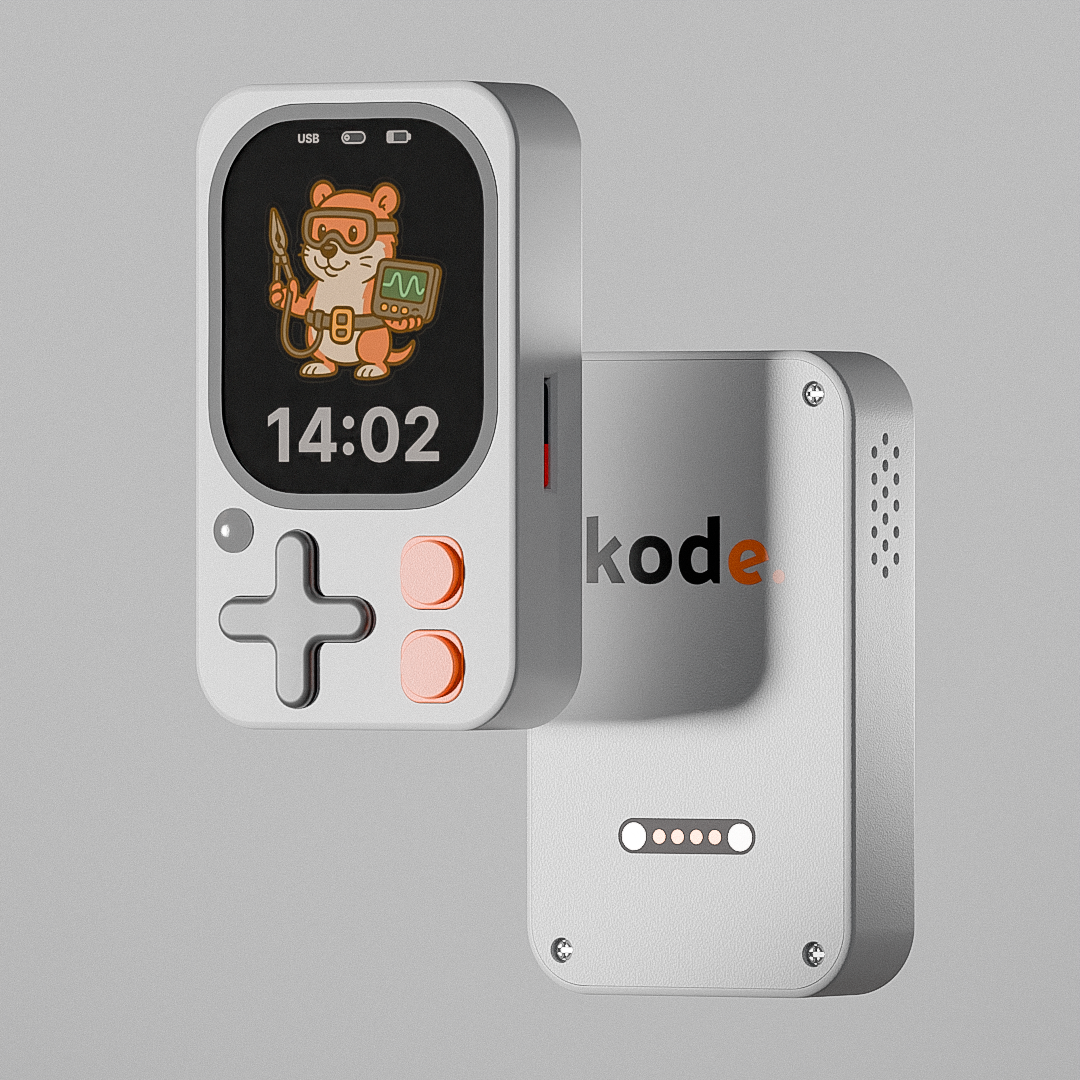
The Kode Dot is the **best maker device on the market.** It is a **all-in-one, pocket-sized device with AI capabilities,** that allows you to learn to program electronics and embedded systems while **building and making your ideas a reality.**
It integrates the most advanced hardware and combines it with kodeOS, our open-source operating system, that allows you to **save your code in applications and share them with the community.**
The main technical features of the Kode Dot are:
| Feature | Description |
| --------------- | ----------------------------------------------- |
| Microcontroller | **ESP32-S3** - 32MB of flash and 8 MB of PSRAM |
| Screen | AMOLED 2.13" |
| Led | RGB Directional |
| Buttons | 4 buttons pad + 2 buttons |
| Audio | **Microphone and speaker** |
| Storage | microSD |
| IMU | **IMU** of 6 axes + **magnetometer** of 3 axes |
| Connectivity | WiFi - Bluetooth - ESP-NOW - **2.4GHz** |
| Connectors | **USB-C** - **Top 20 pins** - **Back magnetic** |
 ## What's in the box
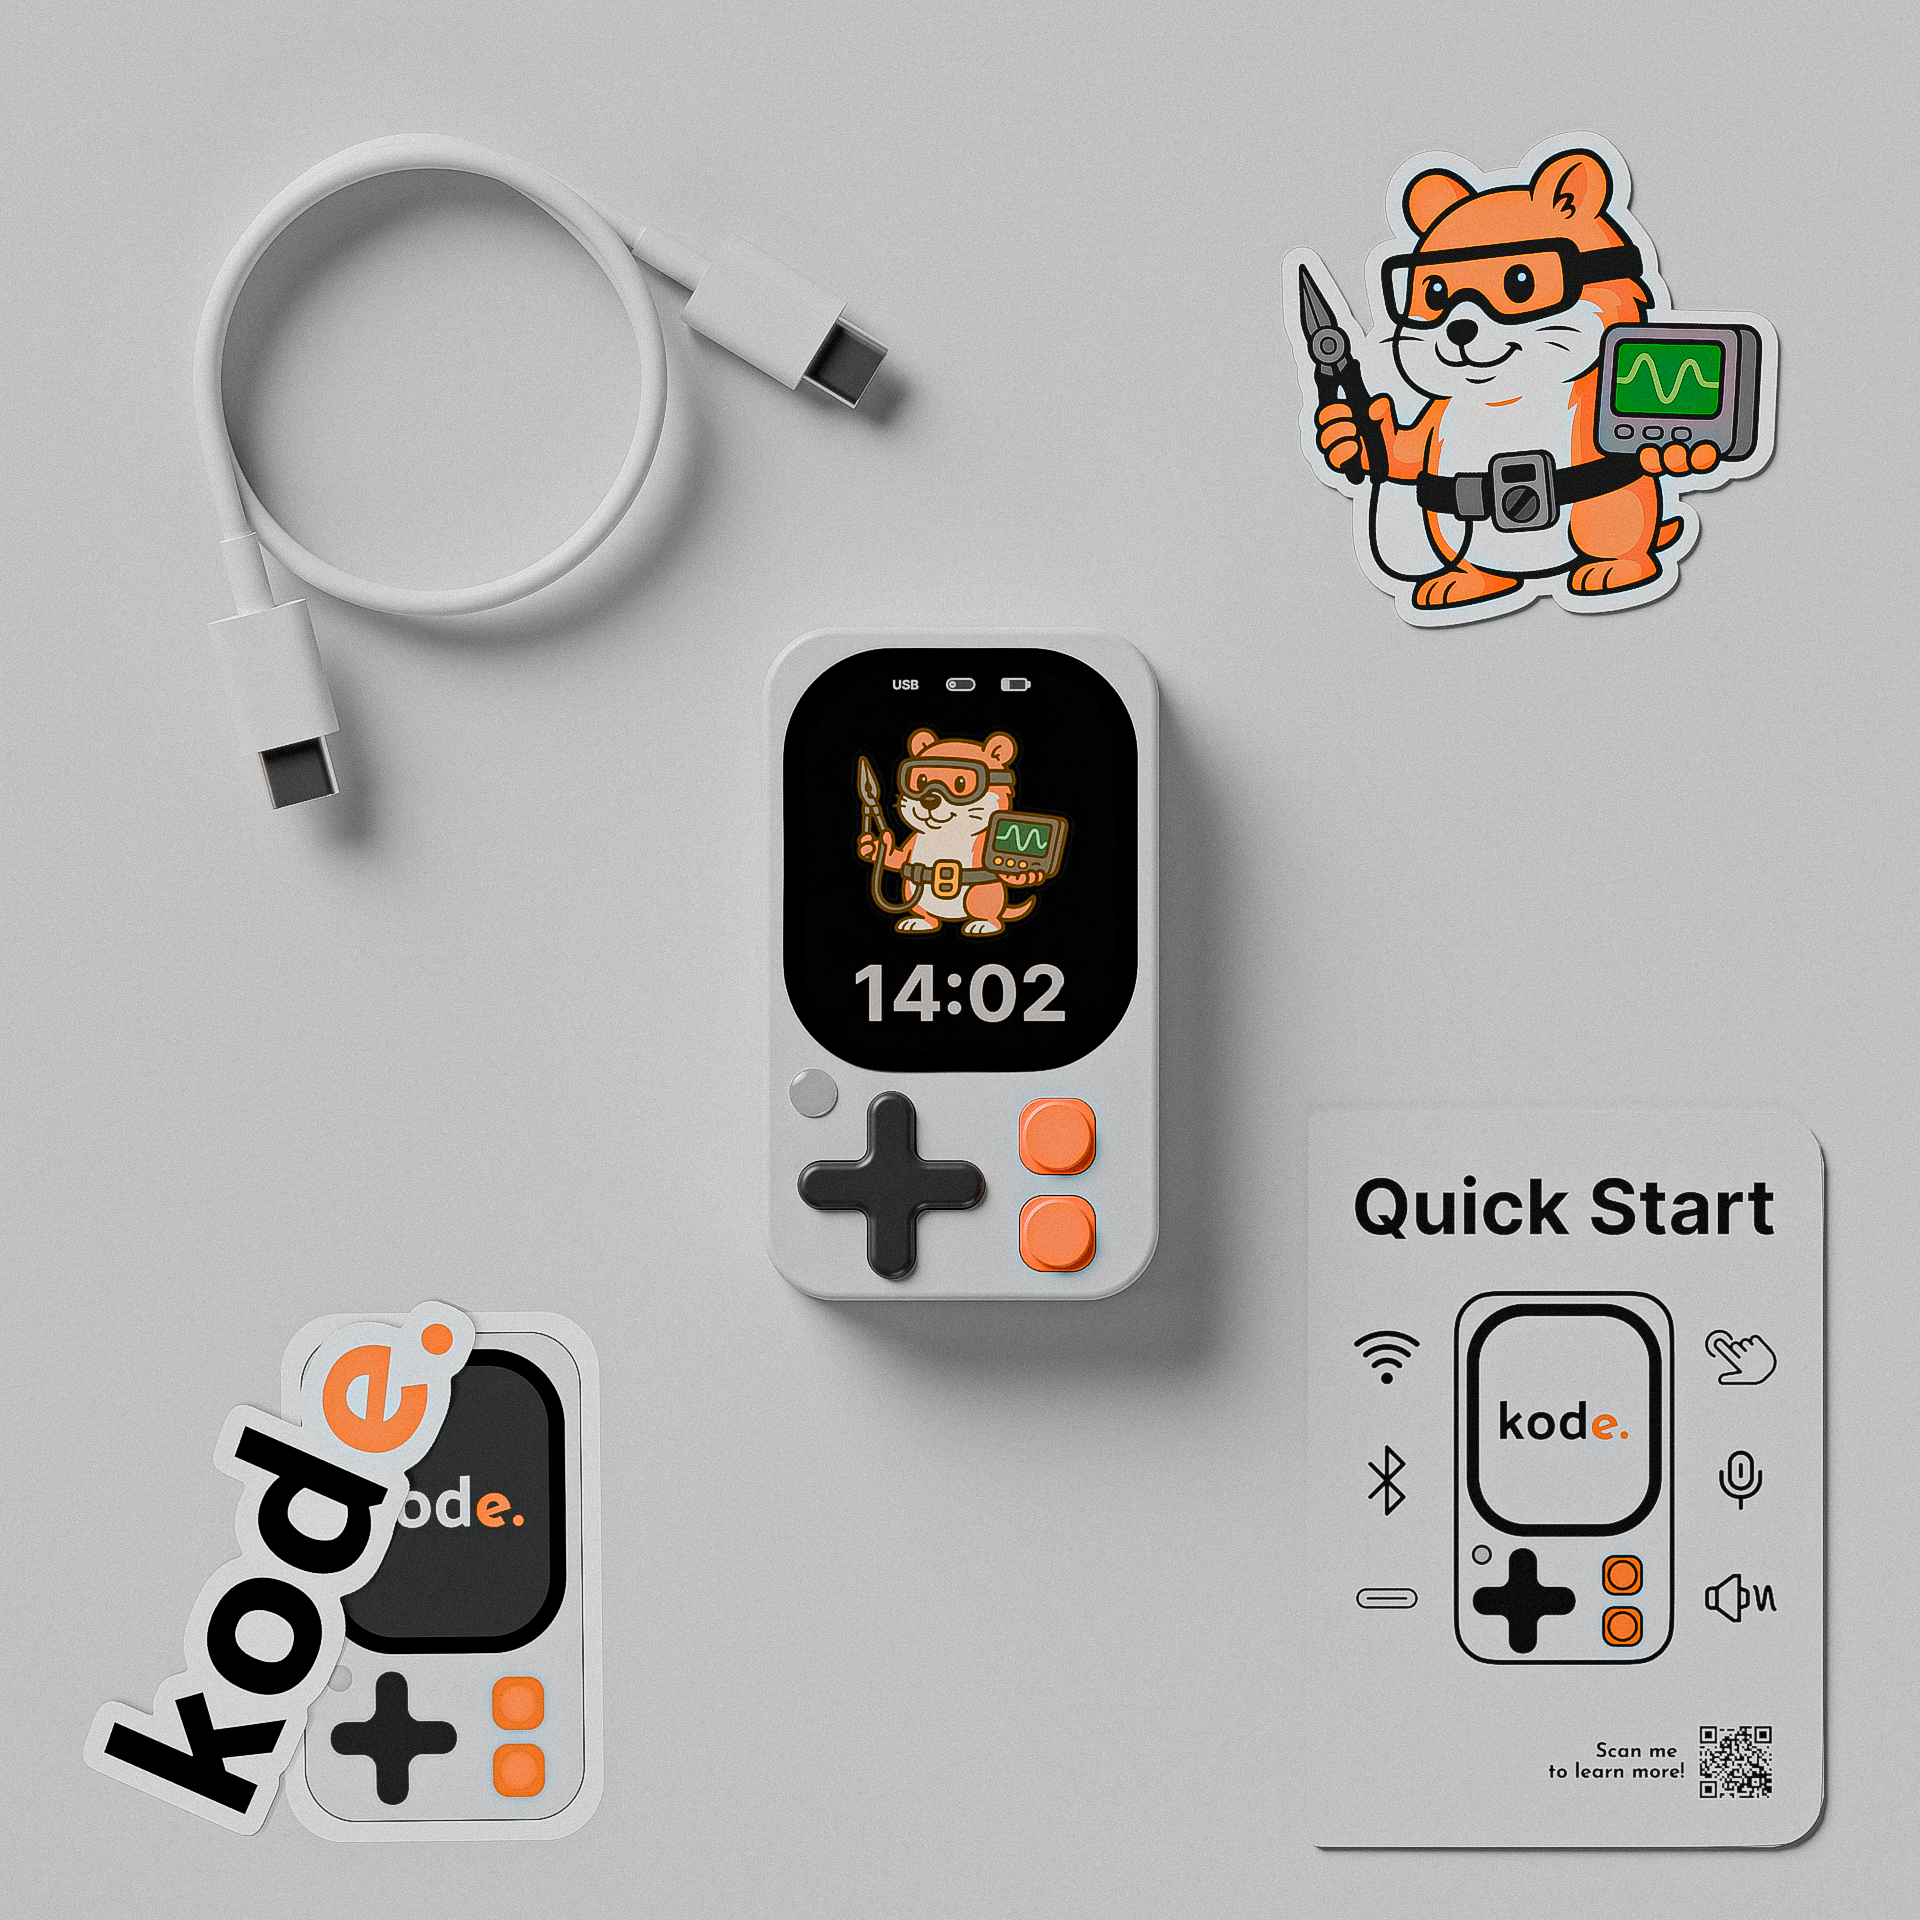
When you buy the Kode Dot, you will receive:
* 1x **Kode Dot**
* 1x **charging and programming cable**
* 3x **stickers**
* 1x **quick start manual**
## What's in the box
When you buy the Kode Dot, you will receive:
* 1x **Kode Dot**
* 1x **charging and programming cable**
* 3x **stickers**
* 1x **quick start manual**
 ## How to turn on the Kode Dot
Just take the Kode Dot out of the box, **press the button on the bottom right for 2 seconds to turn it on.**
You don't have to worry about turning it off because it will automatically detect when you're not using it and enter **suspend mode.**
If you're not going to use your Kode Dot for a **long period of time**, you can press the button on the bottom right for **5 seconds** to turn it off completely.
## Launch your first application
Follow these steps to launch your first application:
Slide your finger **to the left** to enter the **applications menu.** Here, all the categories in which the applications are grouped will appear. Slide down and select the section of **"Games"**.
Here you will see all the applications in the section of "Games". Select the **application "Snake"** to launch it.
On this screen you will see the **title of the application and a small description.** Confirm that you want to launch the application by pressing **"YES".**
Your **Kode Dot will restart** and you can **start playing the famous Snake.**
To exit the application, press the button on the bottom right at the same time as the left pad.
## Create your first application
### Prepare the environment
Uploading your code and turning it into an application is very simple. Let's look at an example of how to do this with Arduino IDE.
Go to the following [link](https://www.arduino.cc/en/software/) and download and install the Arduino IDE.
Open Arduino IDE and in the *Board Manager* search for and install the **ESP32** boards.
## How to turn on the Kode Dot
Just take the Kode Dot out of the box, **press the button on the bottom right for 2 seconds to turn it on.**
You don't have to worry about turning it off because it will automatically detect when you're not using it and enter **suspend mode.**
If you're not going to use your Kode Dot for a **long period of time**, you can press the button on the bottom right for **5 seconds** to turn it off completely.
## Launch your first application
Follow these steps to launch your first application:
Slide your finger **to the left** to enter the **applications menu.** Here, all the categories in which the applications are grouped will appear. Slide down and select the section of **"Games"**.
Here you will see all the applications in the section of "Games". Select the **application "Snake"** to launch it.
On this screen you will see the **title of the application and a small description.** Confirm that you want to launch the application by pressing **"YES".**
Your **Kode Dot will restart** and you can **start playing the famous Snake.**
To exit the application, press the button on the bottom right at the same time as the left pad.
## Create your first application
### Prepare the environment
Uploading your code and turning it into an application is very simple. Let's look at an example of how to do this with Arduino IDE.
Go to the following [link](https://www.arduino.cc/en/software/) and download and install the Arduino IDE.
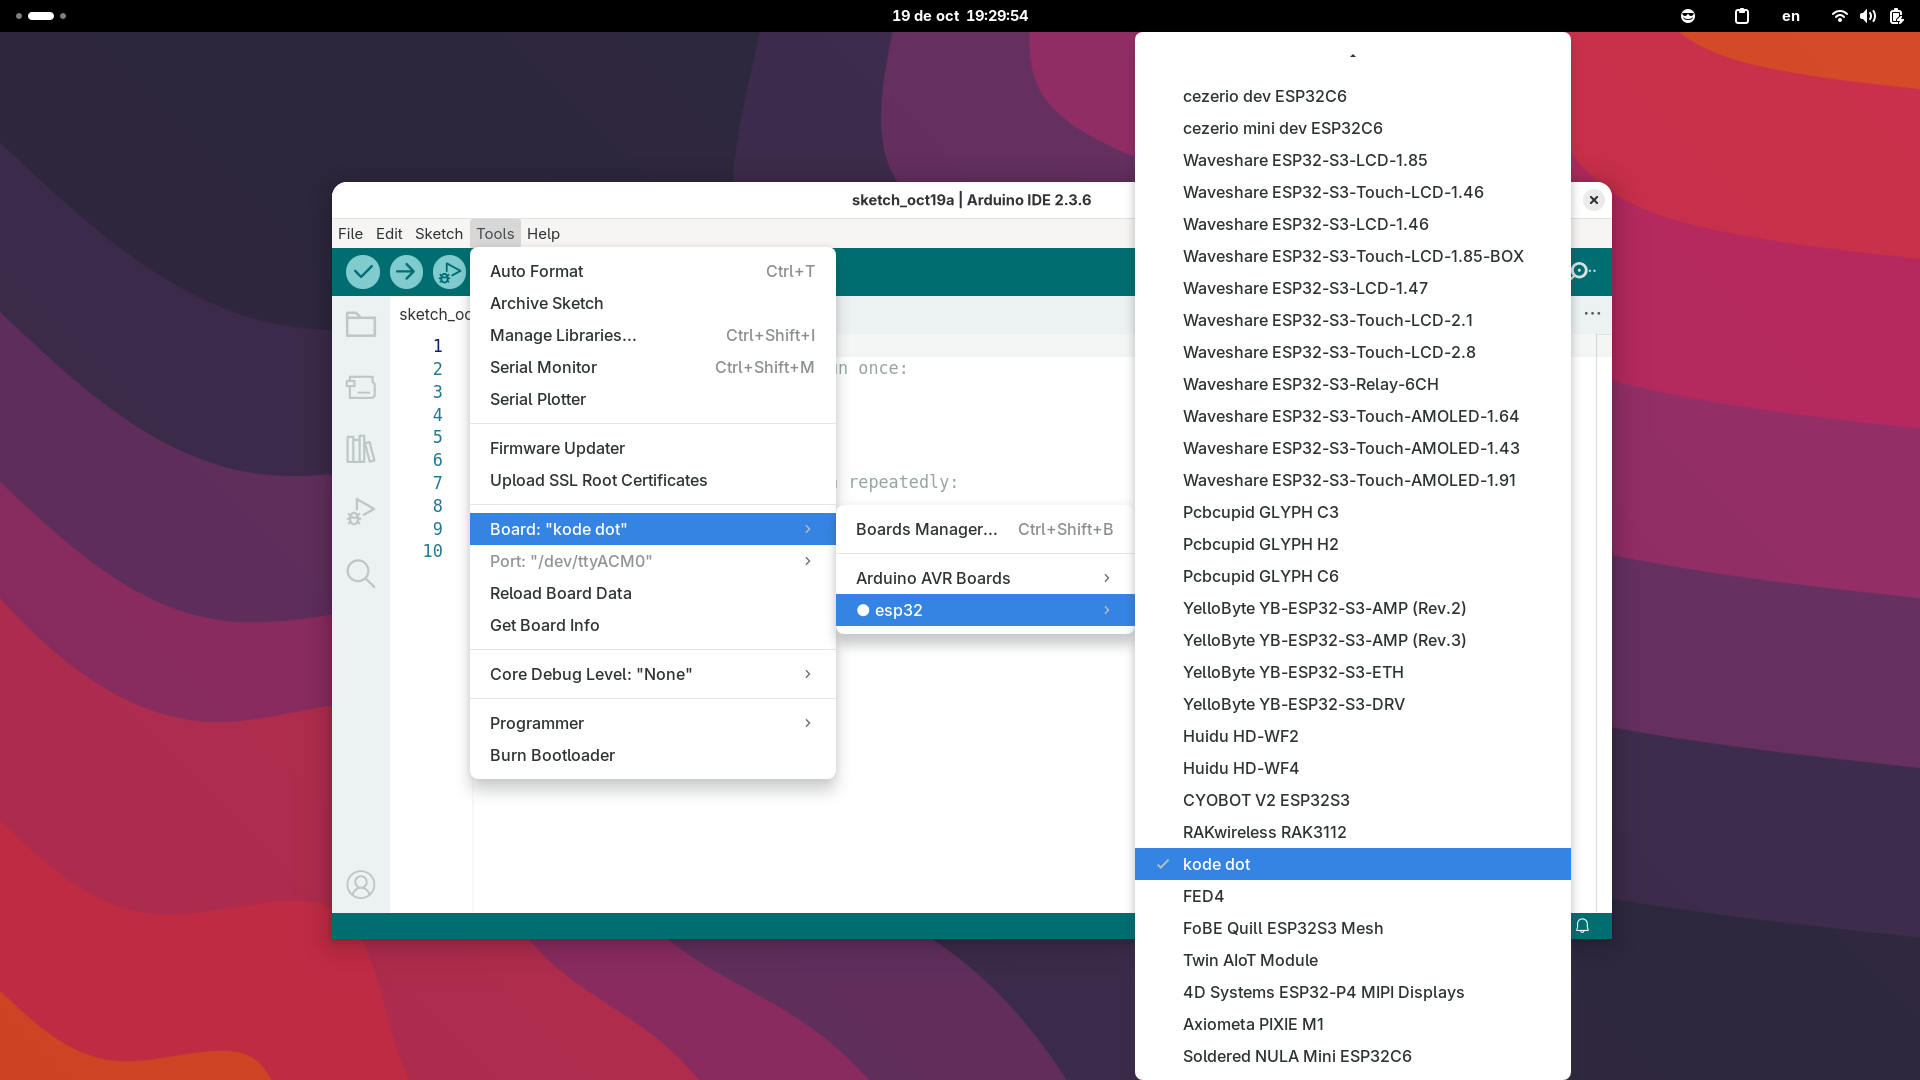
Open Arduino IDE and in the *Board Manager* search for and install the **ESP32** boards. 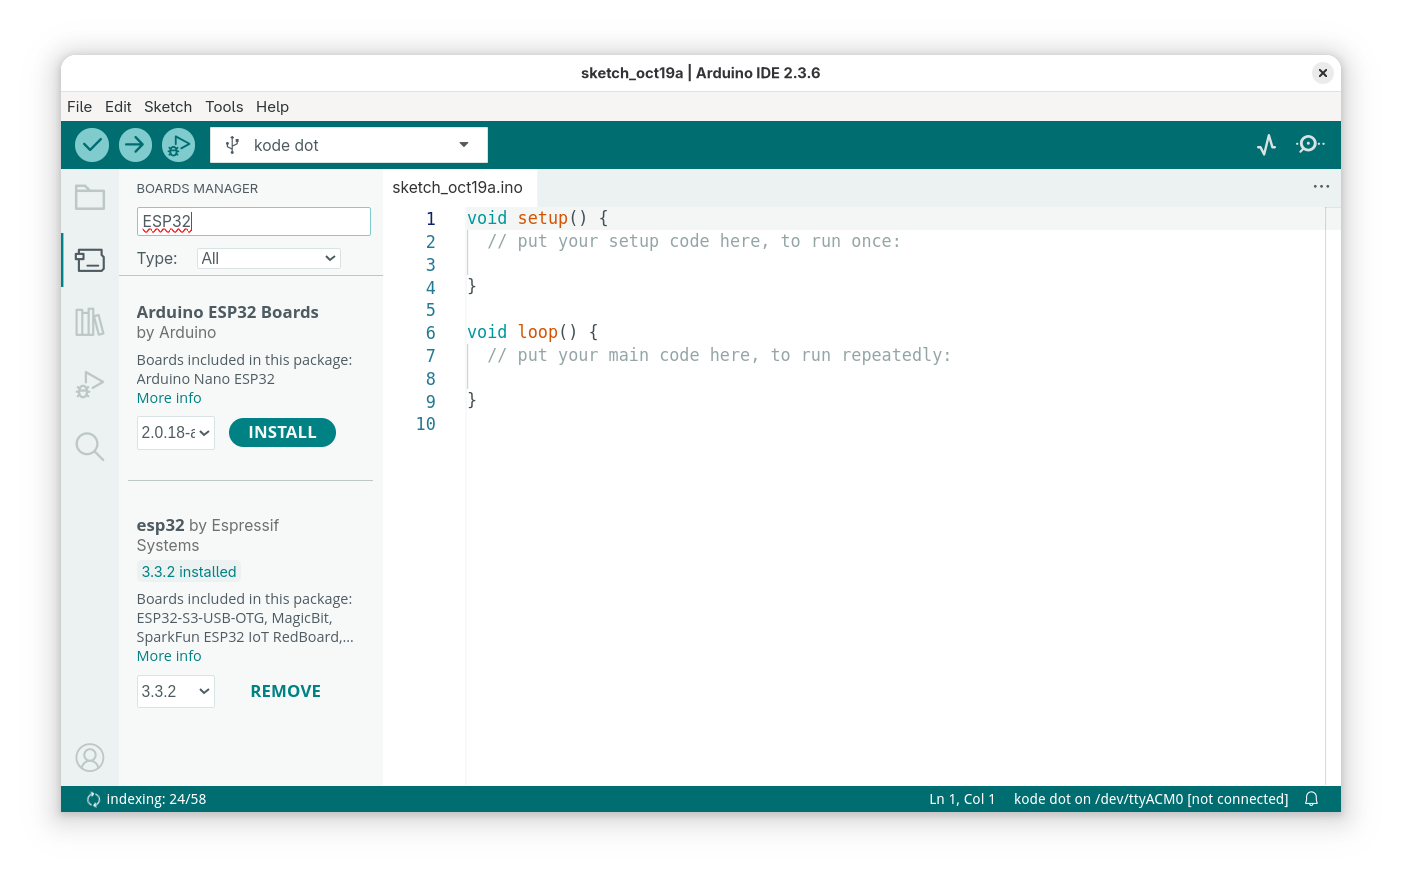 Select the Kode Dot as the board in "Tools > Board > esp32 > Kode Dot".
  ### Upload your code and create the application
Copy this sample code into the Arduino IDE. This code prints information from the ESP32-S3 chip to the serial monitor every 3 seconds.
```cpp esp32s3_info.ino icon=microchip lines theme={null}
void setup() {
Serial.begin(115200); /* Start serial communication at 115200 baud */
}
void loop() {
/* Print model and revision of the ESP32 chip */
Serial.printf("ESP32 Chip model = %s Rev %d\n", ESP.getChipModel(), ESP.getChipRevision());
/* Print the number of cores of the chip */
Serial.printf("This chip has %d cores\n", ESP.getChipCores());
/* Print the unique identifier of the chip */
Serial.print("Chip ID: ");
Serial.println(ESP.getEfuseMac());
/* Wait 3 seconds before repeating */
delay(3000);
}
```
Swipe your **finger to the right** on the Kode Dot to enter the **upload code menu.** When you connect your Kode Dot to your computer, it will appear in the **device list** in the Arduino IDE. Click the **Upload** button to upload the code.
Now in the **upload code menu of the Kode Dot**, you will see the option to **execute the code you just uploaded or create an application.** Select the option of **"Create App"** and save it in the category of **"General"**.
Go to the applications menu, enter the category of **"General"** and you will see your **newly created application** ready to be launched.
### Upload your code and create the application
Copy this sample code into the Arduino IDE. This code prints information from the ESP32-S3 chip to the serial monitor every 3 seconds.
```cpp esp32s3_info.ino icon=microchip lines theme={null}
void setup() {
Serial.begin(115200); /* Start serial communication at 115200 baud */
}
void loop() {
/* Print model and revision of the ESP32 chip */
Serial.printf("ESP32 Chip model = %s Rev %d\n", ESP.getChipModel(), ESP.getChipRevision());
/* Print the number of cores of the chip */
Serial.printf("This chip has %d cores\n", ESP.getChipCores());
/* Print the unique identifier of the chip */
Serial.print("Chip ID: ");
Serial.println(ESP.getEfuseMac());
/* Wait 3 seconds before repeating */
delay(3000);
}
```
Swipe your **finger to the right** on the Kode Dot to enter the **upload code menu.** When you connect your Kode Dot to your computer, it will appear in the **device list** in the Arduino IDE. Click the **Upload** button to upload the code.
Now in the **upload code menu of the Kode Dot**, you will see the option to **execute the code you just uploaded or create an application.** Select the option of **"Create App"** and save it in the category of **"General"**.
Go to the applications menu, enter the category of **"General"** and you will see your **newly created application** ready to be launched.